

There they all are. A rabble of Year 5s jostling each other at my door waiting to come in. Super noisy and unsettled.
Great! It’s going to be one of those lessons – the ones where it takes all your energy just to get the students in the classroom and settled so you can start.
Sound familiar?
Solution? Structure and Technology
Students love ‘being in charge’ and they love being on their devices. So, I decided to combine the two to regain control of the start of my lessons.
Students at my school have 1:1 iPads from Years 4 to 7. When they arrive to my lessons, they come in and log themselves into class and complete a formative assessment – a bit like an Exit Ticket but at the start of the lesson instead of the end (I don’t know about you, but exit tickets never worked for me because I never had enough time left for students to complete them).
How To – QR Code Logins
I explored how I could use QR codes linked to a kid-friendly interface that could do three things:
- Time stamp when the students arrived (I often have late students due to extra curricular activities)
- Record their name as an official roll book without me having to ‘take the roll’
- Ask a few questions related to their learning that I could use as a formative assessment
To create your own like mine, you need:
Google Forms – can be found in your Google Drive.
QR code creator – I really like QRStuff.com
Step 1 – Create a Form
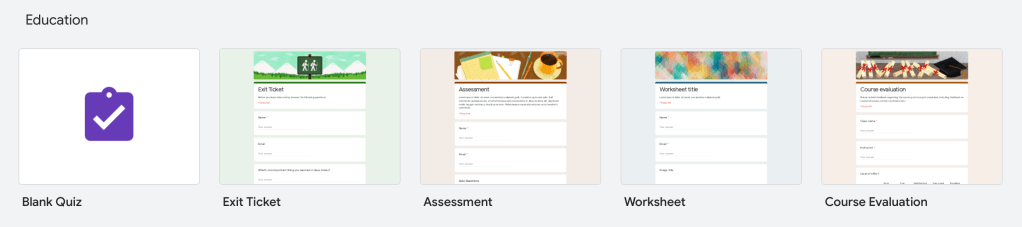
In Google Forms, create a ‘form’ from a template. Check out the education section – any of those templates will work.

Add questions to your form – I usually stick to 3. Questions can be short or long answer, multiple choice, sliding scale, lots of options! And you can add images and media to your questions.
Then, personalise your form as much or as little as you like. There are plenty of in-built design images or you can create your own and add them. Maybe incorporate your Bitmoji?
Step 2 – Create a QR code
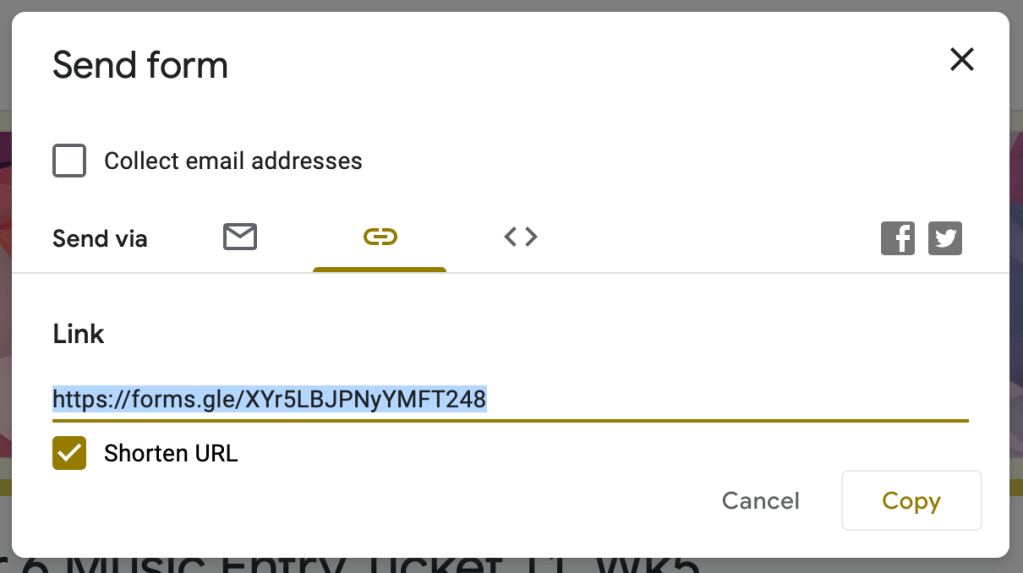
Now your form is created, you need to link it to a QR code.
Click on the “SEND” button in your Google Form. Select the link icon and copy the link.

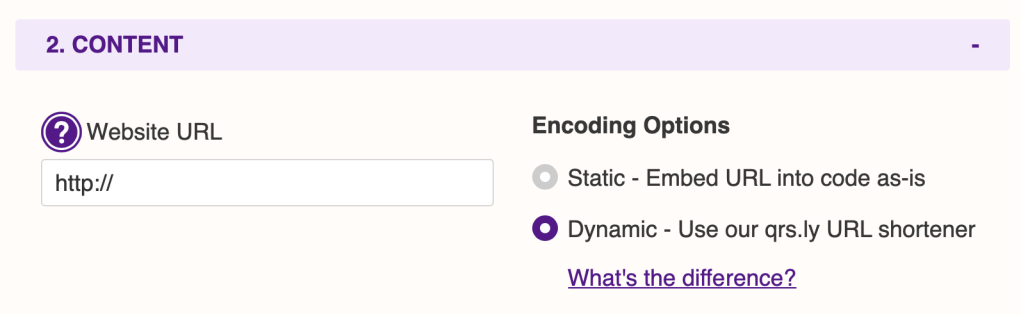
Now, go to http://www.qrstuff.com (or another QR code creator site of your choice)
Paste the link into the “CONTENT” section and watch as your code is generated.
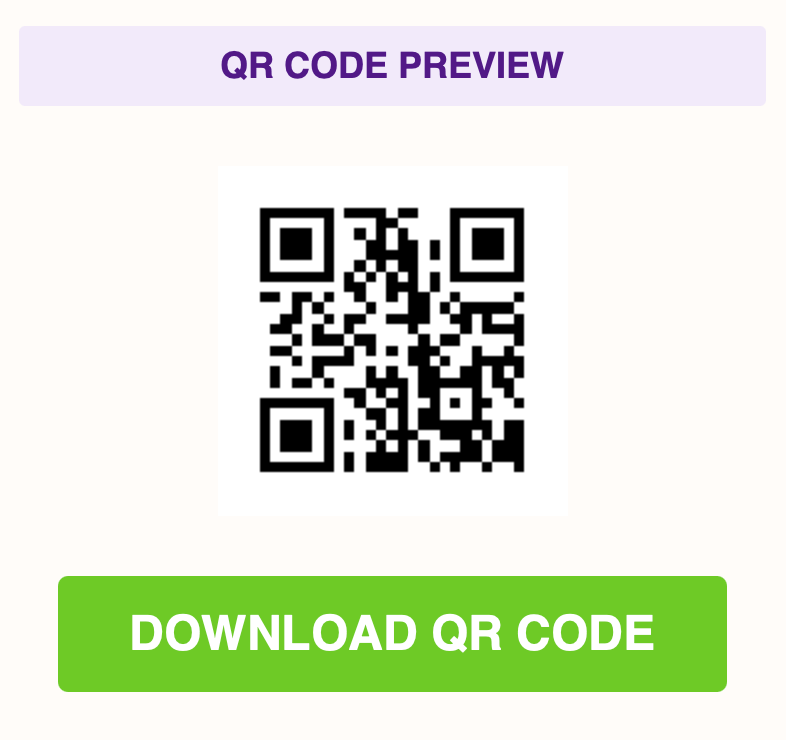
Click “DOWNLOAD” and your code will be ready for you to print and display.
Step 3 – Logging In and Getting Responses
Have students use the camera function on their iPads to scan the code and enter the form.
Once they have completed the form, they select “SUBMIT” and their responses will be recorded in your Google Drive.
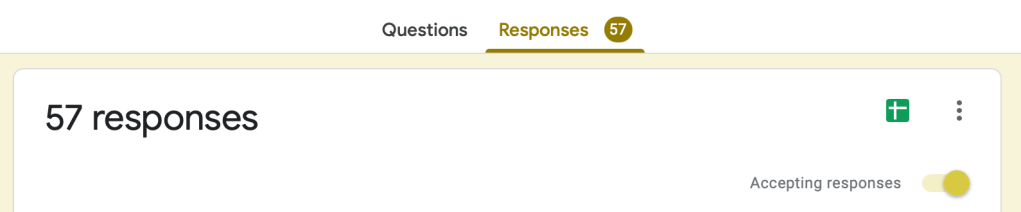
To view responses, enter the form you created and select “RESPONSES” at the top. This will take you to where you can view all the responses your students have submitted.
You can also select the Excel Spreadsheet icon and view the responses including timestamps.
No more trying to get the students to sit quietly while you take the roll! Have them engaged from the moment they enter your room.
Resources
Want to try out how it works? Have a go at one I have made just for you!
Take your iPad or mobile phone and scan the QR code below.

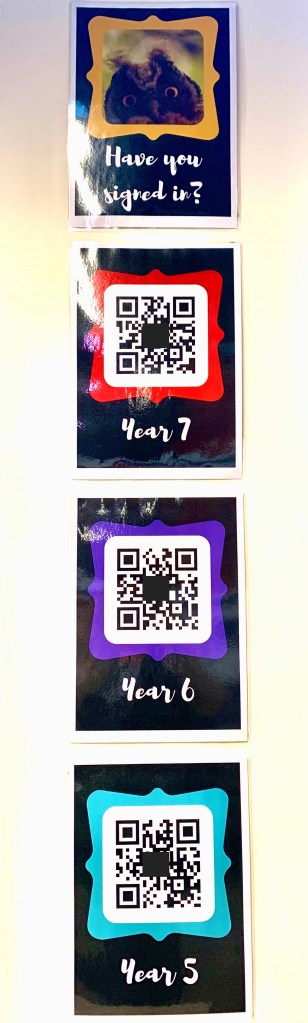
Sounds complicated? Once you have created your first one, you can easily just duplicate and edited your quizzes for each week. I have a little display area where the students go and scan their codes and each week I just stick up the new QR codes. I created the signs using Canva.
I’d love to hear from you if you get a chance to try it in your classroom!
Danielle x
Cover image: http://clipart-library.com/clipart/1063046.htm
